Step-by-Step Guide to Building a Debris Hut
Quick Answers Up Front:
- Time to build: 1-3 hours for one person.
- Materials needed: One sturdy 7-8 foot ridgepole, assorted sticks and branches, 2-3 feet of leaves, pine needles, moss, or ferns—no tools required.
- Who it’s for: 1-2 adults. Crawl in feet-first for max warmth.
- Why it works: Traps your 98.6°F body heat like a giant sleeping bag, keeping you 20-40°F warmer inside than outside.
Picture this: You’re miles from help, rain’s coming, temps dropping. No tent, no tarp. What do you do? Whip up a debris hut—the go-to shelter pros swear by for real wilderness survival. I’ve thrown together dozens over 20 years of bushcrafting, from soggy Pacific Northwest forests to bone-dry Southwest ridges. It’s dead simple, uses stuff right underfoot, and flat-out saves lives by beating hypothermia, the #1 wilderness killer.
What Is a Debris Hut (and Why It’s a Game-Changer)
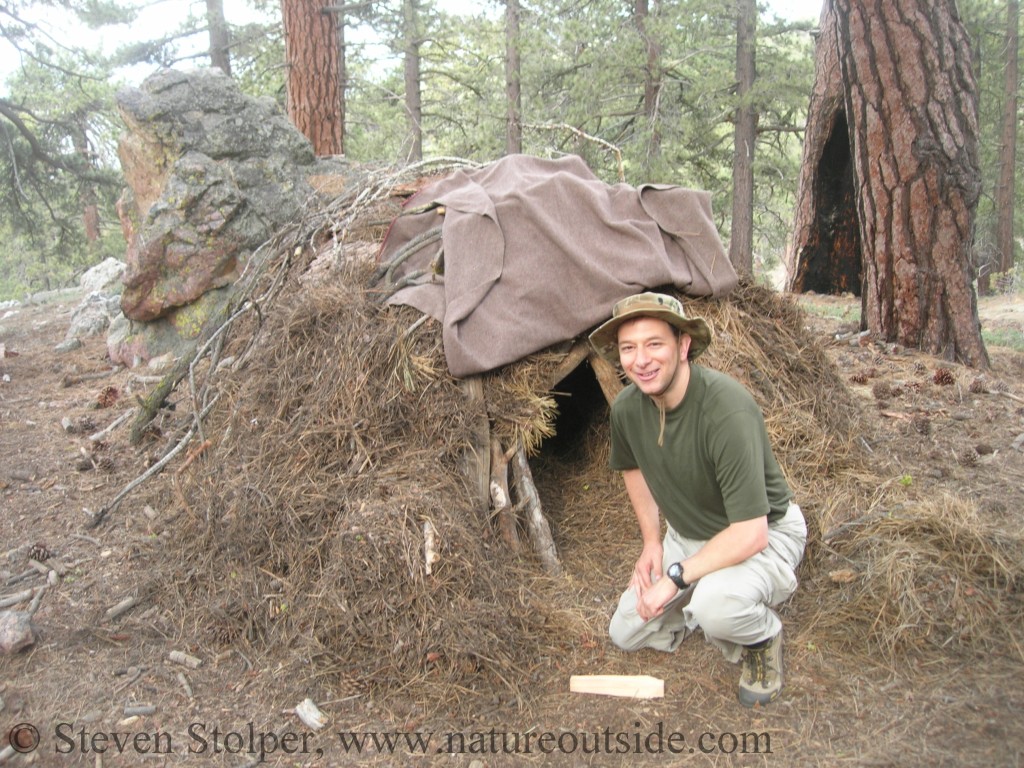
A debris hut is an A-frame mound of sticks buried under piles of forest junk—leaves, needles, bark. Crawl in, plug the door, done. No cords, no canvas. Just nature.
Why it crushes other shelters:
- Vs. lean-to: Full enclosure traps heat better—lean-tos leak wind.
- Vs. tarp setups: Zero gear needed; tarp fails if lost.
- Vs. snow cave: Works year-round, anywhere with debris.
Pros build these first because 80% of survival is shelter. They turn your body into a furnace, no fire required (though a small one nearby rocks).
Perfect Scenarios for Your Debris Hut
- Lost hiker/camper: Day turns night, storm hits.
- Bug-out drills: Test gear-free skills.
- Overnight bushcraft: Family fun or solo challenge.
- Cold snaps: Down to 20°F? I’ve slept comfy at 24°F in one.
Logic: In forests (80% of U.S. wildland), debris is everywhere. Quicker than digging a trench, warmer than rock huddles.
Gear Check: What You’ll “Need”
- Ridgepole: 7-8 ft straight, thumb-thick, strong (test: bend it).
- Ribs: 20-30 sticks, arm-length.
- Lattice: Finger-thick twigs.
- Insulation: Leaves/needles (2-3 ft deep).
- Optional: Knife for snapping, shirt for door plug.
Hunt close—save energy.
Step 1: Pick Your Spot Like a Pro
Bad spot = wet, cold failure. Good spot = toasty sleep.
Golden Rules:
- Flat, drained ground: No dips (flash floods pool here).
- Debris jackpot: Piles of dry leaves nearby.
- Sun + wind break: Morning light warms it; trees block gusts.
- Safe zone: 50 ft from “widowmakers” (dead branches), trails (critters), water (bugs/floods).
- Hillside hack: Face door downhill for warmth rise.
Logic: Pros scout 10-15 min here. Saves rebuilds.
The 9-Step Build: From Frame to Cozy Cocoon
Total time: 1-3 hours. Start early!
Step 1: Nab & Set the Ridgepole
Find 7-8 ft strong branch. Prop one end on stump/log/rock 1 ft higher than your shoulder (lie down to test). Other end: Tree fork or forked sticks.
Why: Too low = cramped; too high = heat escapes.
Step 2: Lock It Down
Wiggle-test: Can’t move? Good. Add rocks if shaky.
Step 3: Rib the Roof
Lean 20-30 sticks from ridge to ground at 45° angle, 6-12 in apart. Tips touch ground 6 in outside your body outline. Snap long ones.
Why: “Rib cage” holds debris; angle sheds rain.
Step 4: Weave the Lattice
Perp twigs over ribs (like grill). Thumb-thick, tight.
Why: Stops leaves falling in your face.
Step 5: Pile Exterior Debris
2-3 ft thick over everything but door. Rake, don’t carry—sweep piles over.
Why: Insulation R-value like a quilt. Less = freeze.
Step 6: Secure the Pile
Light branches atop to pin it.
Step 7: Bed Down Inside
Shove 1-2 ft leaves in floor. Crawl feet-first, roll to fluff.
Why: Ground sucks 25% heat—bed stops it.
Step 8: Door Plug
Stuff shirt/jacket with leaves. Jam in entry.
Step 9: Test Night
Curl fetal. Warm in 10 min.
Visual Guide:

Pro Tips to Level Up Comfort
- Wet leaves? Use ’em—body dries overnight.
- Bugs out: Smoke entry with pine needles.
- Hot rock hack: Heat stones by fire, bury in bed.
- Size hack: Smaller = warmer (your body fills space).
- Fluff daily: Compresses 50% overnight.
5 Rookie Mistakes That’ll Leave You Freezing
- Big & baggy: Heat escapes—hug your outline.
- Skimpy debris: 1 ft? Cold. 3 ft min.
- Ridge too high: Wind tunnel.
- No lattice: Leaf avalanche.
- Bad door: Draft city—plug tight.
Logic: These kill 90% of first-timers’ huts. Fix ’em, sleep like a king.
Tweaks for Rain, Snow, or Wind
| Condition | Tweak | Why It Wins |
|---|---|---|
| Heavy Rain | Extra 1 ft debris; steeper ribs. | Sheds water like roof shingles. |
| Snow | Pine boughs outer layer. | Blocks melt-in. |
| Wind | Build low; tree-backed. | Cuts 30% chill. |
| 2+ People | Double ridge, lean-to hybrid. | Scalable party pad. |

Make It Last 3+ Nights
- Re-pile daily.
- Fire reflector: Logs outside door.
- Tarp topper: If you have one.
- One guy lived 2.5 years! Layers + maintenance.
Stay Safe: Bugs, Fire, and Critters
- Bugs: Smoke ’em; check for nests.
- Fire: 10 ft away; wet debris = fireproof.
- Critters: Small door; store food outside.
- Exit plan: Keep knife handy.
- Health: Hypothermia signs? Crawl in NOW.
Frequently Asked Questions
How long does it really take? 1-3 hours solo; practice halves it.
Works in desert/jungle? Desert: Rare debris—nope. Jungle: Too buggy, try hammock.
Warmer than tent? Yes, if no sleeping bag—body heat rules.
Kids build one? With help, yes—great scout project.
Can I add a fire inside? No! Smoke + dry leaves = inferno.
Your Next Move
Grab a weekend, hit the woods, build one. Feel that rush when it hits 80°F inside at dusk? That’s survival mastery. Share your pics—tag #DebrisHutPro. Stay wild!
Sources: Pulled from top bushcraft sites like Wilderness College, Battlbox, and real-world tests. Questions? Drop ’em below.